Help centreReceiving money

Issue a receipt

By the end of this the money is in the pocket’s books and the donor has a receipt with a serial number on it.

Before you start

  • The donor, already in the directory
  • The amount, and what it is for
For
Nazim, Mutamid, Incharge Finance, Consumer
Steps
7
Reading time
4 min
Updated
Home, then Receive Money, then the donor, the amount and the reason, then Next and confirm. Shown at three times speed.
The four things a receipt needs
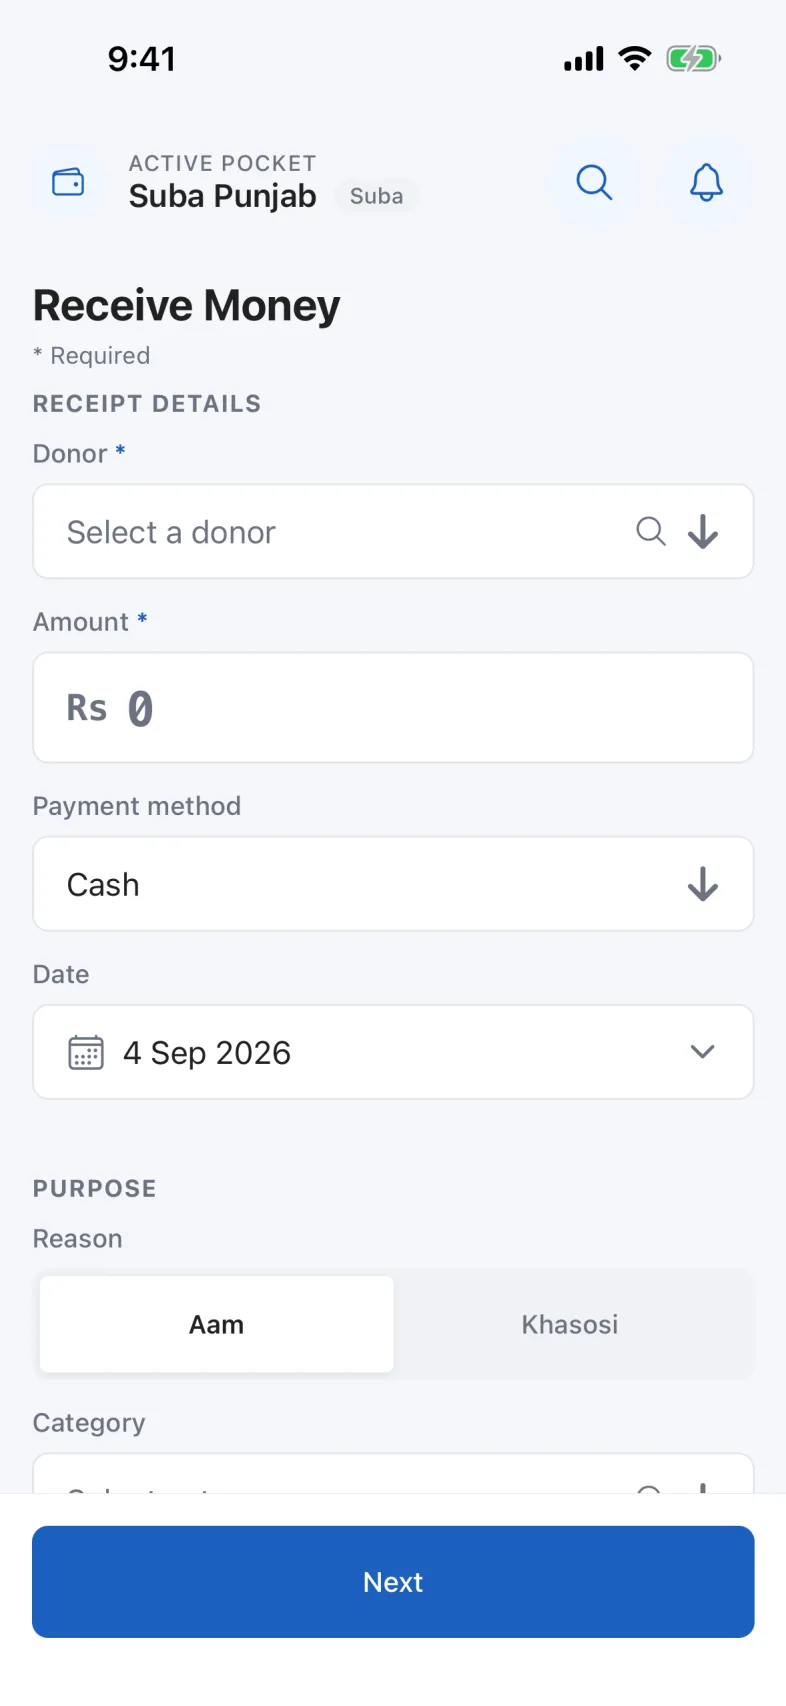
The Issue Receipt form before anything is filled in, showing the donor field, amount, purpose and category.
  1. DonorWho the money came from.
  2. AmountIn rupees. The app writes the paisa itself.
  3. ReasonAam for general funds, Khasosi for a specific purpose.
  4. CategoryZakat is its own category, because it is reported on separately.
  1. On Home, press Receive Money

    It is the first of the buttons under the balance.
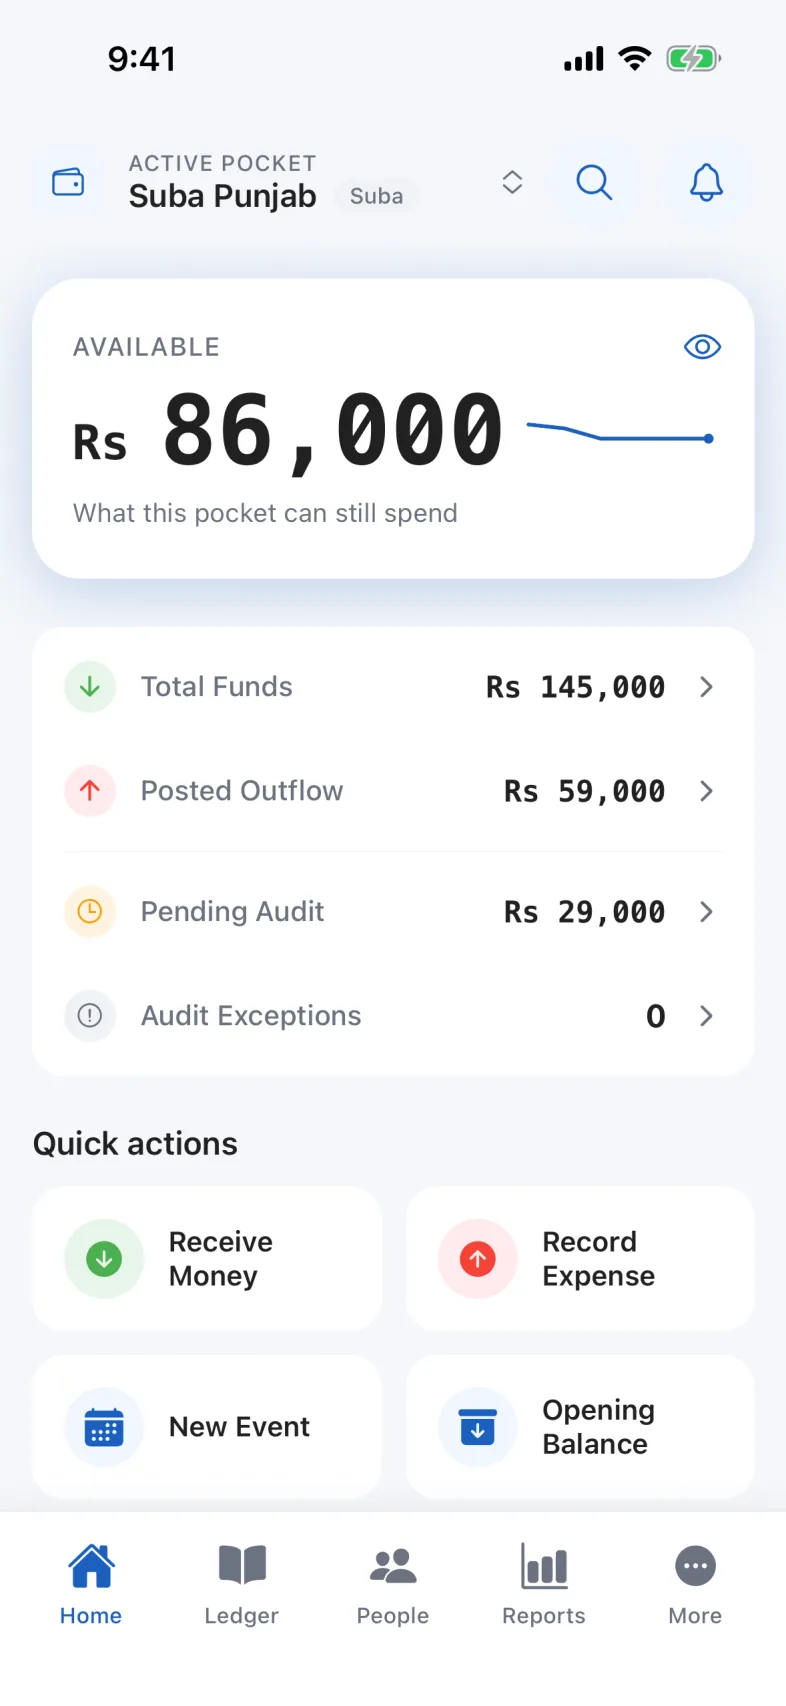
    The Home tab as a Nazim: the active pocket name at the top, the available balance, a breakdown of funds, the quick action buttons, and the five tabs along the bottom.
  2. Choose the donor

    Start typing a name and the list narrows.

    If the person is not there yet, add them first from the People tab.
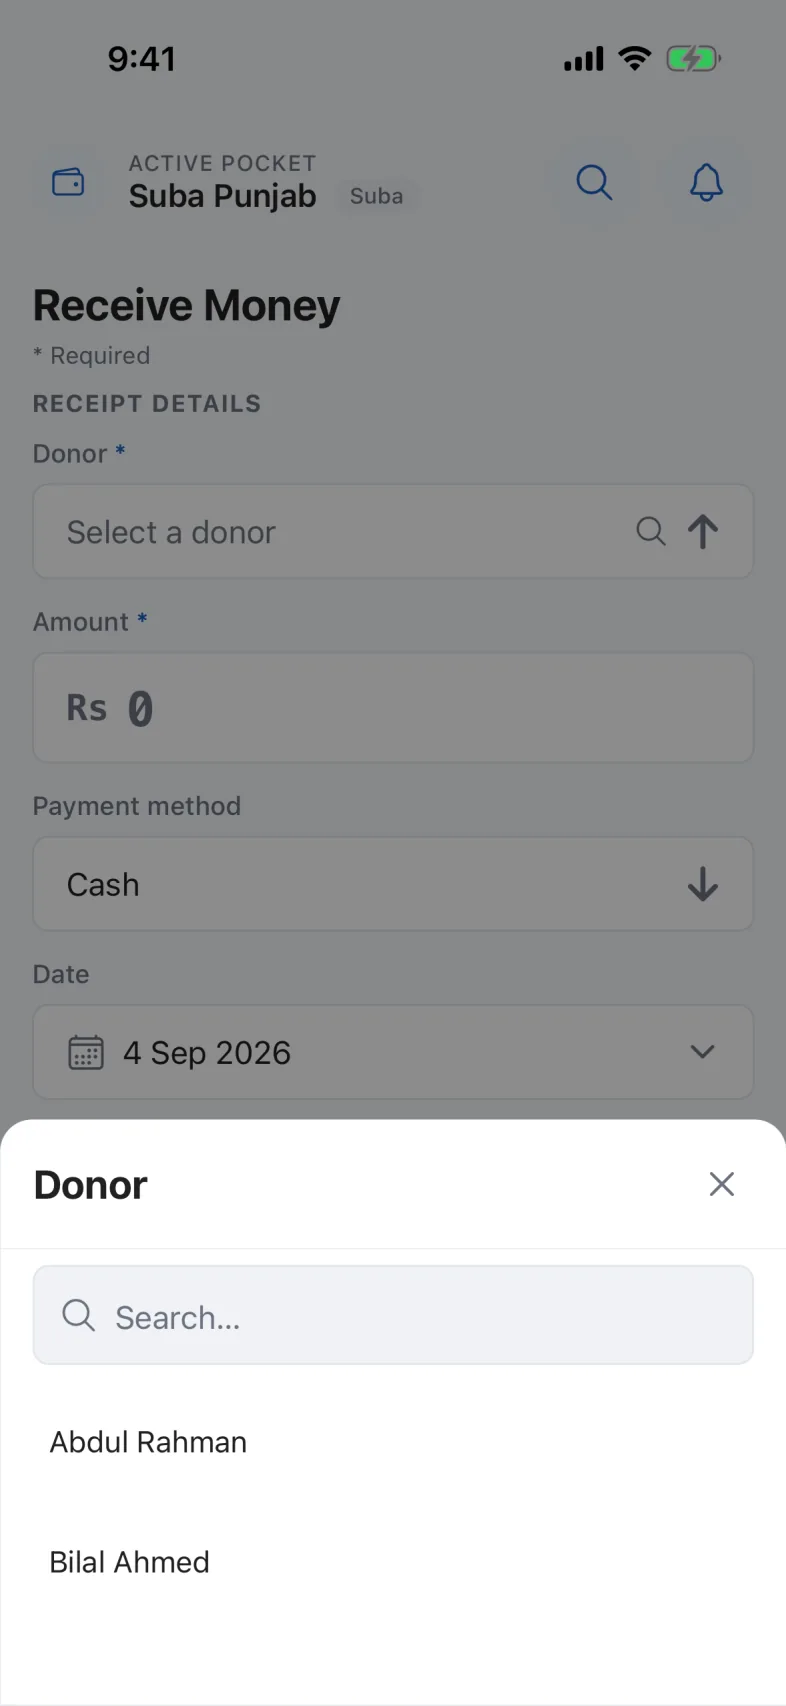
    The donor picker open on the Issue Receipt form, with a search box and the pocket’s donors listed beneath it.
  3. Enter the amount

    Rupees only. The app writes the paisa itself.
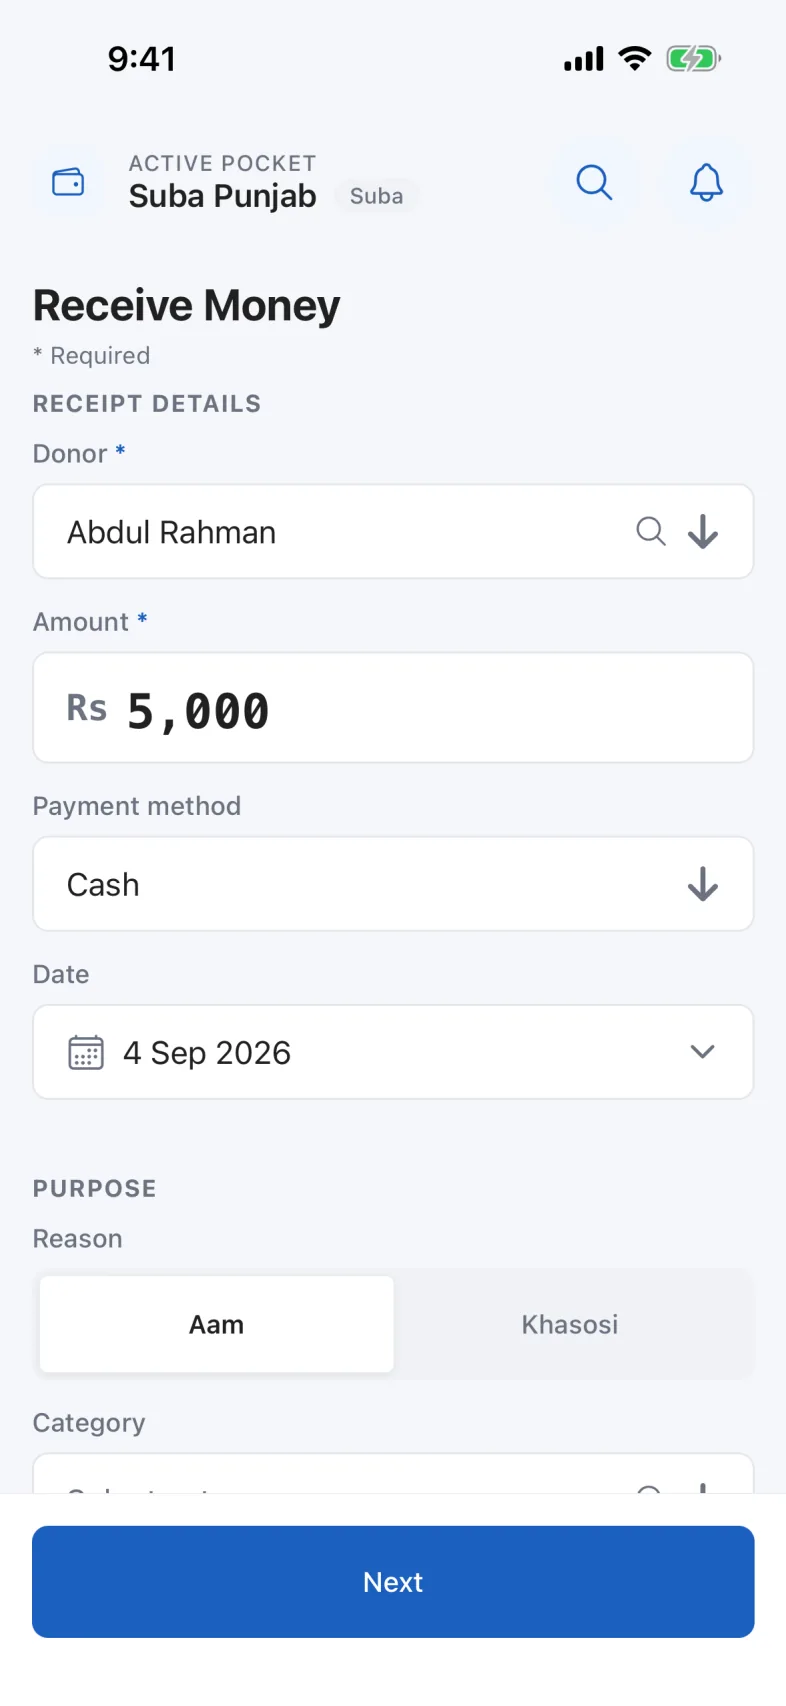
    The Issue Receipt form with a donor chosen and an amount typed into the amount field.
  4. Choose the reason and the category

    Aam is for general funds; Khasosi is for a specific purpose.

    Zakat is its own category, because it is reported on separately.
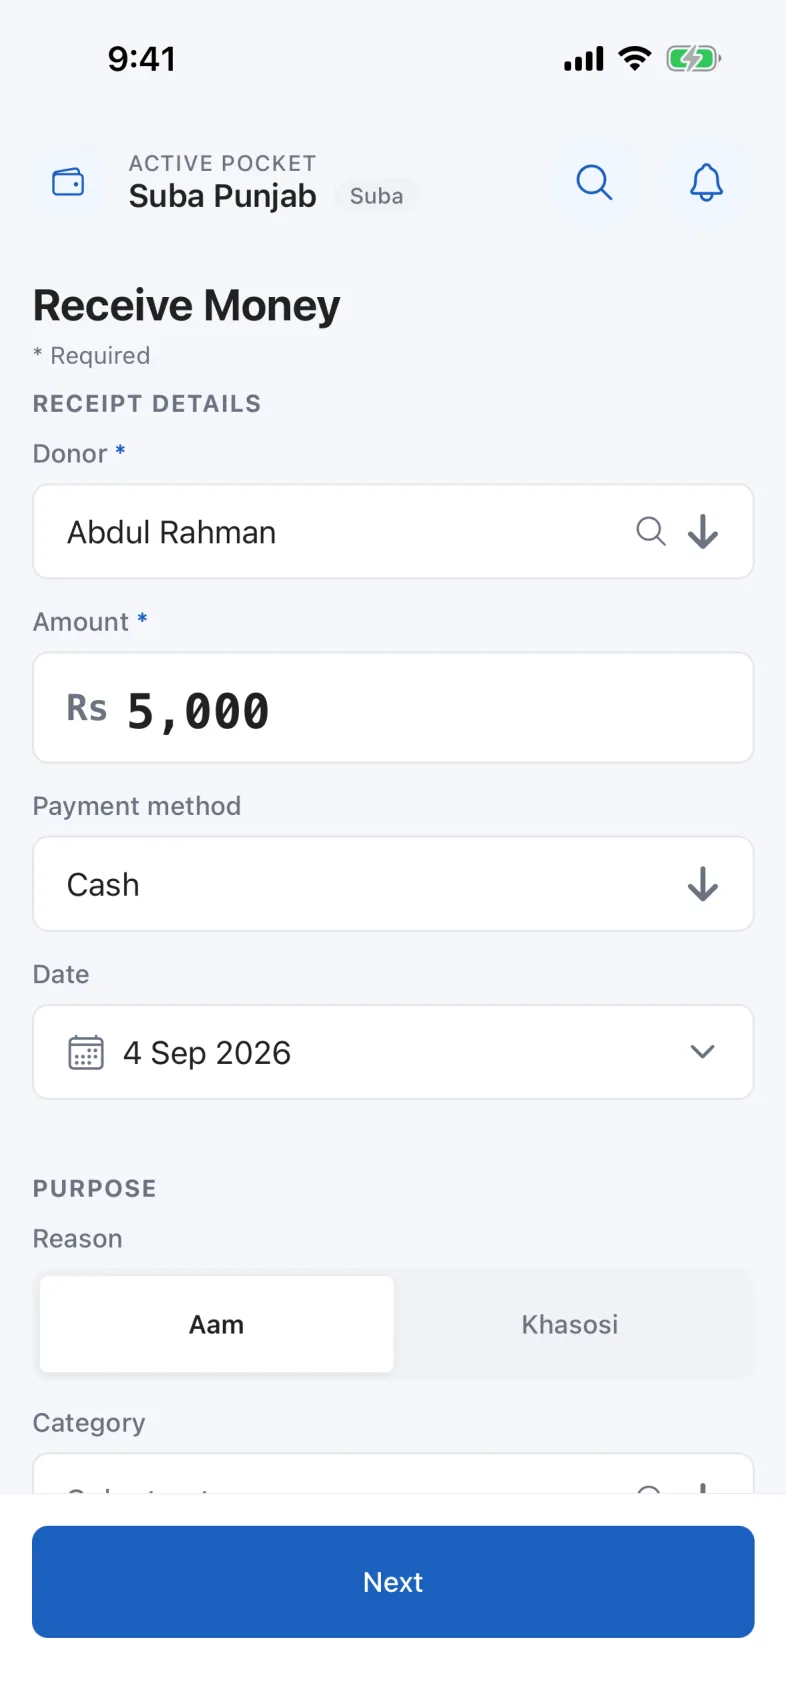
    The completed Issue Receipt form with donor, amount, purpose and category all filled in and the Issue button enabled.
  5. Read the summary before you confirm

    It shows the pocket the money is going into. Check that first.

    This is the last point at which anything can change. An issued receipt cannot be edited or deleted by anybody, including you.
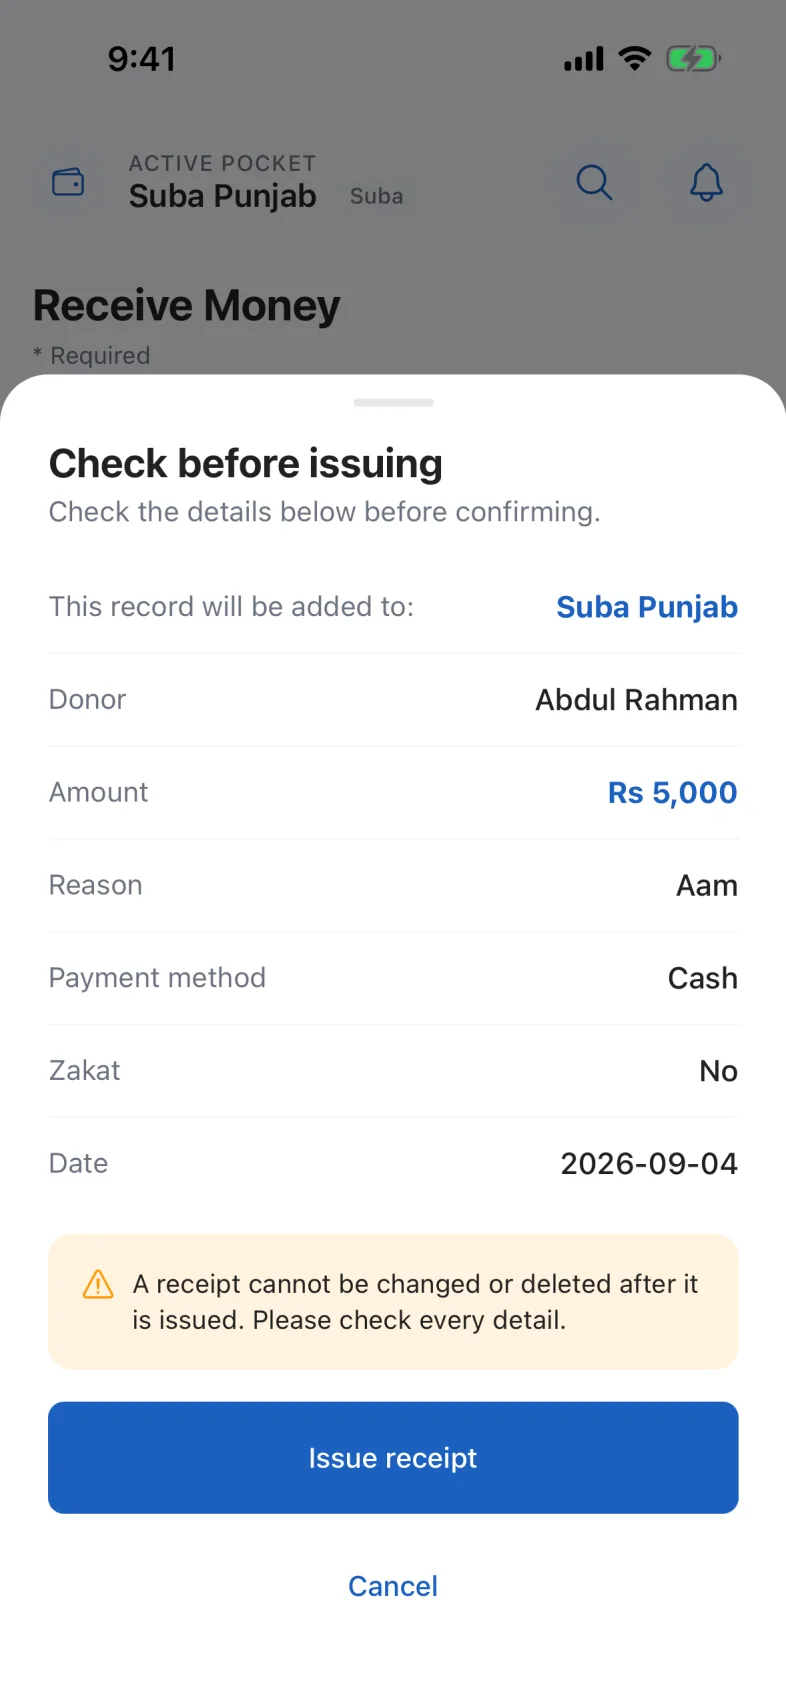
    The confirmation sheet that appears after Next, listing the donor, amount, date and pocket, with a warning that an issued receipt cannot be changed.
  6. The receipt gets its number

    The server assigns the serial. It is counted per pocket, per year.
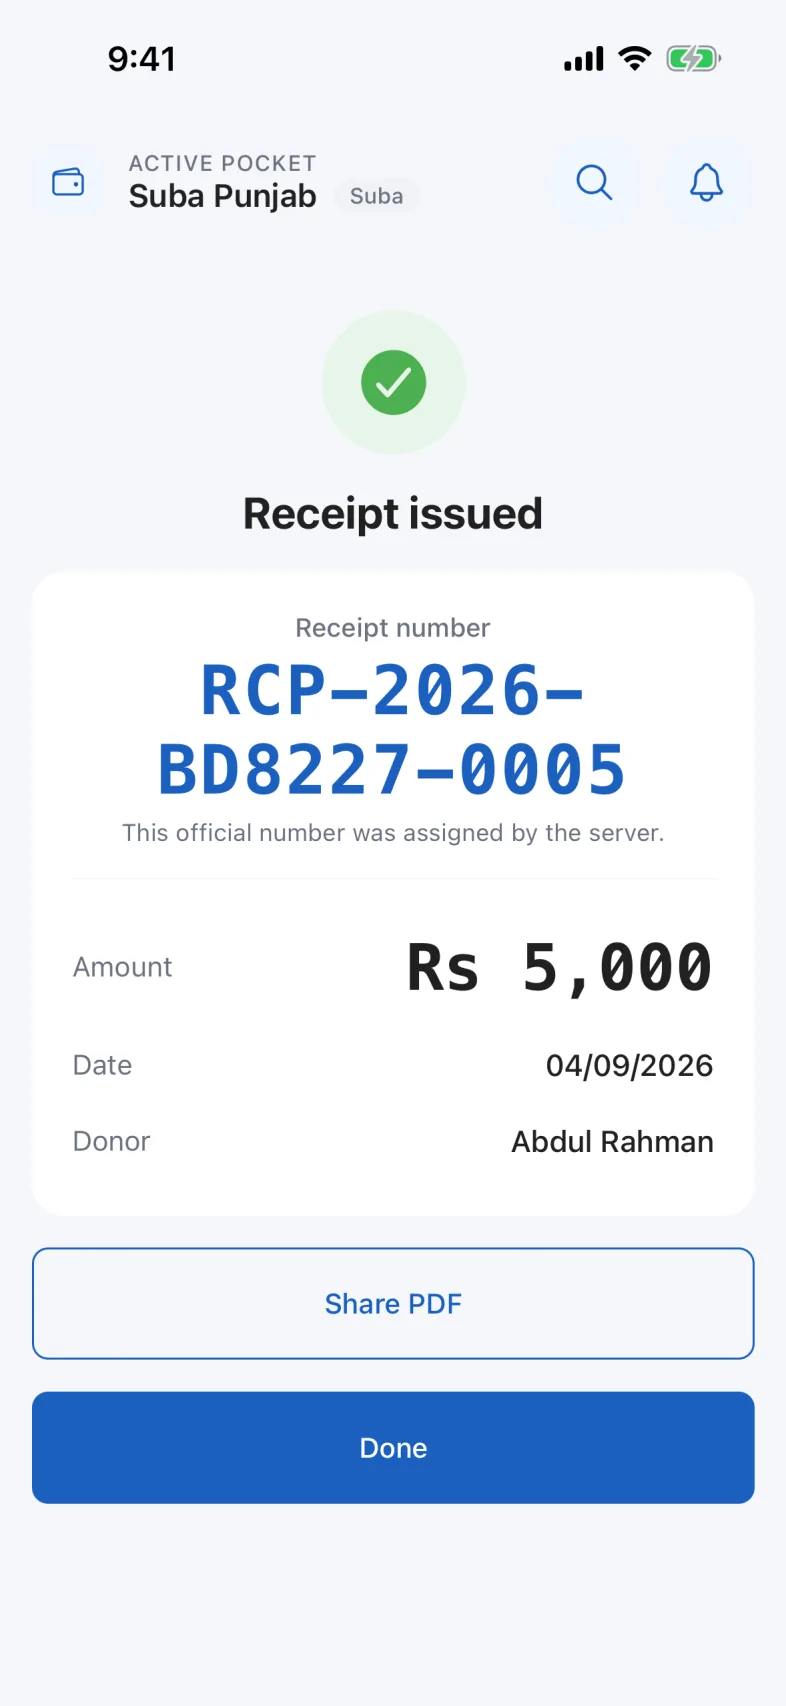
    The confirmation screen after a receipt is issued, showing its serial number and buttons to share or print it.
  7. Share it with the donor

    Share PDF sends it through WhatsApp, email, or anything else on your phone.

    The confirmation screen after a receipt is issued, showing its serial number and buttons to share or print it.

If something goes wrong

I typed the wrong amount and pressed Issue.
The receipt stands. Tell your Nazim: the correction is a second, opposite record, and both stay in the books so the trail is honest.
The donor is not in the list.
Add them from the People tab, on the Donors segment, then come back. A donor is created once and used for every receipt afterwards.
Does the donor get anything automatically?
If they have an email address on file, they are sent the receipt with a link to confirm it or tell us something is wrong.

Read next

Did this not cover it?

Tell us what you were trying to do and where it stopped, and a person will read it.